

Security cameras
A smarter view of your home, with a timeline to review.
A detailed guide to choosing, positioning and setting up the Wi-Fi PT Pro, including what OnWatch recording actually captures.
TL;DR
- The PT Pro connects to 2.4 GHz Wi-Fi and uses the My Uniden + app.
- The kit includes a solar panel and 32GB microSD card.
- OnWatch provides a time-lapse-style background timeline, with a default interval of one frame every two seconds.
- Automatic tracking, remote pan and tilt, a spotlight and two-way talk add useful control; placement remains essential.
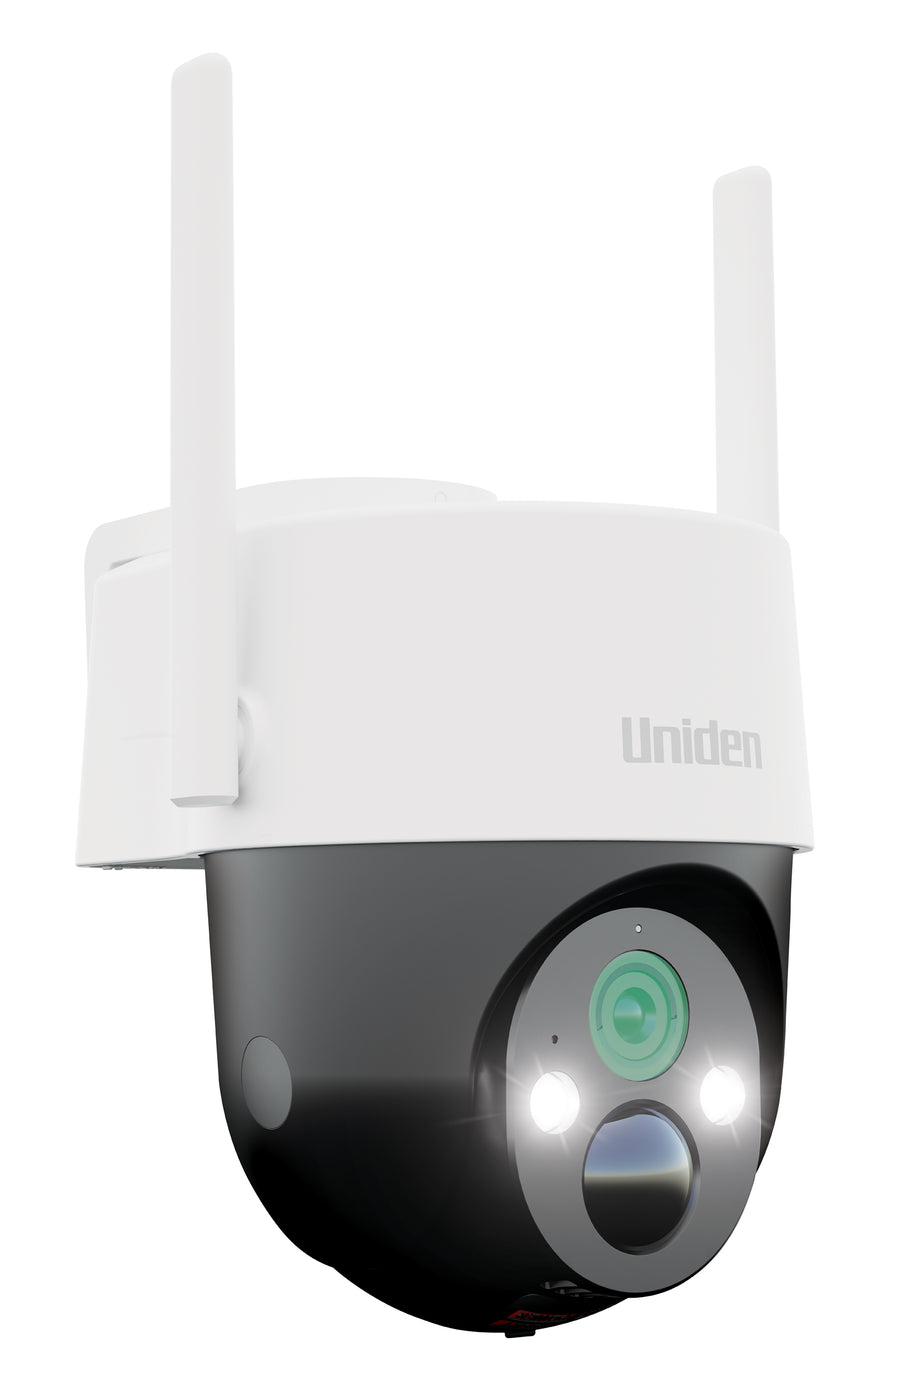
The Uniden SOLO X2K PT Pro suits a homeowner who wants more than a fixed view and isolated motion clips. It combines a moving camera, automatic motion tracking and OnWatch recording with a rechargeable battery and a separate solar panel.
The buying decision still starts with the property. This is a Wi-Fi camera, so it needs reliable coverage where it is installed. Its moving lens can help you inspect different areas, but it cannot see through obstacles or watch opposite directions at the same instant. Here is how to decide whether it fits your home and how to make the most of its features.
Who is the SOLO X2K PT Pro best suited to?
Consider the PT Pro for a front approach, driveway, side entrance or backyard where your home Wi-Fi reaches consistently. Its combination of motion events and a background timeline is useful when you want to check what happened around an alert, rather than opening only a short event clip.
For example, you might want to inspect a delivery area, check whether the side gate was left open and look across the driveway from your phone. Remote pan and tilt can help you check those views without physically adjusting the camera.
Before buying, identify the one area that must remain in view. If the most important subject is always at a single doorway, make sure a tracking movement will not leave that doorway outside the frame. If Wi-Fi does not reach the location, compare the SOLO X2K 4G Pro Kit rather than trying to solve a network problem with extra camera features.
What does the kit give you?
| Feature | Practical use |
|---|---|
| 2K Super HD camera | Live viewing and saved footage of the area in front of the lens |
| Motorised pan and tilt | Adjust the view remotely and inspect different parts of the scene |
| Automatic motion tracking | Follow detected movement within the camera's available view |
| OnWatch | Review background activity between motion events |
| Included solar panel and 32GB card | Support charging and local recording from the supplied kit |
| Spotlight and two-way talk | Check visitors and speak through the camera |
Those features work together, but each depends on the installation. The camera still needs a clear view, the panel needs sunlight and the app needs a working connection for remote access. Check the current product listing for the complete box contents before ordering.
What does OnWatch 24/7 recording mean?
OnWatch adds a background recording timeline to the camera's motion-event functions. The PT Pro manual describes its default full-time setting as one frame every two seconds. That is a time-lapse-style view of the day, rather than ordinary video at a full frame rate for every hour.
You can select different background intervals in the operating-mode settings. Motion triggers also generate event recordings and notifications. The combination gives you two ways to review activity: jump to an event, or inspect the wider timeline.
This matters when comparing a battery camera with a mains-powered continuous recorder. A time-lapse timeline offers useful context, but there can be movement between the recorded frames. Choose the recording method around what you need to capture.
For a fuller explanation, read continuous recording versus motion detection and OnWatch. It also explains why the local timeline and cloud motion backup should not be treated as the same thing.
Check the Wi-Fi at the mounting point
The PT Pro manual specifies 2.4 GHz Wi-Fi. Pairing your phone with a different network band does not establish that the camera has a suitable connection. Confirm the network name and settings that the camera will use during setup.
Walk to the intended mounting position and check the connection there. A detached wall, metal shed, brickwork or another part of the building may weaken the signal compared with the connection inside your home.
After setup, test live view and a saved recording while your phone is using a separate internet connection. This checks the remote access you will depend on when away. A good picture on the same home network is only part of the setup.
If coverage is inconsistent, review the network or move the camera to a location that still captures the approach. Our Wi-Fi versus 4G guide helps decide when a mobile-connected camera would be a better match.
Position the camera around a real approach
Aim at the path a person would use to reach your door, gate or driveway. Start with the camera's default view, then test the available movement. Check whether gutters, branches, walls or outdoor furniture obstruct any of the views you want to use.
Ask someone to walk the approach at an ordinary pace. Review the resulting event and tracking behaviour. A preview with no moving subject cannot show whether the installation will capture useful activity.
Test after dark as well. A built-in spotlight can support colour night viewing, but distance, angle, glare and other lighting affect the result. Avoid framing a bright external light when the area you need to see is much darker.
More pan coverage does not mean simultaneous coverage of the entire property. If two important entrances sit on opposite sides of a wall, additional cameras may be the more practical choice.
Give the solar panel a separate placement check
The camera and panel do different jobs. Position the camera for the view; position the panel for the most useful sunlight that the installation allows. The included separate panel gives you some flexibility, subject to its cable and mounting requirements.
Look beyond the weather on installation day. A nearby tree, roofline or taller fence can shade the panel at another time. Check the position during the day and reassess it as the season changes.
Frequent events, extended live viewing and more demanding recording settings can affect the charging balance. Monitor the battery trend instead of expecting the solar panel to guarantee indefinite operation in every position.
If charging falls behind, work through the solar-camera battery and charging checklist before assuming a larger problem. Follow the model's charging instructions when a manual recharge is needed.
Use local storage and cloud backup for different jobs
The supplied microSD card gives the camera local storage. The included seven-day rolling cloud service provides backup for motion recordings. It should not be described as a full cloud archive of the continuous OnWatch timeline.
Open both an event and the timeline during setup so you understand where each is stored and how to retrieve it. If an incident matters, save the relevant material before the rolling retention or card overwrite removes it.
A card inside the camera and a cloud event copy serve different purposes. Local storage supports reviewing recorded activity; an uploaded event provides an additional copy away from the camera. Confirm that the cloud service has been enabled and that uploads are working rather than assuming this from the presence of the card.
A first-week setup plan
- Charge and pair the camera using the current manual and My Uniden + app.
- Check the card is recognised and recording is enabled.
- Mount the camera for the key approach and the panel for sunlight.
- Test a daylight walk-through, motion alert and tracking movement.
- Repeat the check after dark and review the saved result.
- Test remote access away from your home Wi-Fi.
- Review the battery trend, alerts and timeline during the first week.
Use the results to refine the position and settings. The aim is useful recordings and relevant notifications, with a charging setup that suits the activity at your property.
Frequently asked questions
Does the SOLO X2K PT Pro work on 5 GHz Wi-Fi?
Its manual specifies 2.4 GHz Wi-Fi. Use a compatible 2.4 GHz network for setup and operation.
Can I use the PT Pro at a shed without Wi-Fi?
It needs Wi-Fi for its network connection. If a reliable home network cannot reach the shed, compare a 4G model and check mobile coverage there.
Is OnWatch a full-frame-rate recording all day?
The manual describes a time-lapse-style background mode with selectable intervals; the default is one frame every two seconds. Motion events work alongside that timeline.
Does the camera come with a solar panel and storage card?
The current kit lists a separate solar panel and 32GB microSD card. Check the selected listing for the latest box contents.
Will automatic tracking replace several cameras?
It can help you inspect a wider scene, but the lens still points in one direction at a time. Separate cameras may be needed for simultaneous coverage of different entrances.
Build your home security around the view that matters.
Check the PT Pro kit, confirm Wi-Fi at your chosen location and plan the panel position.
SOLO X2K PT Pro: media coverage and setup resources
Read reporting on the Pro range's motion-tracking update and a retailer guide comparing Wi-Fi and 4G options. A dedicated independent hands-on Wi-Fi PT Pro test was not established in this search.
Media coverage


Share:
2026 Buyers Guide the Best Solar Security Cameras in Australia
Solo X2K 4g PRO vs Solo 4G Plus